This is goind to be the begining of a series of posts about fusion of deep learning and Raspberry Pi!
Deep Learning has become a new world language in the recent 5 years. With the latest development in the convolutional neural network, LSTM, attention models, GANs, reinforcement learning, we see a promising trend of training model to do things that in the past human believed only human brain can master. For example, writing a caption to an image, or composing a piece of music, or driving a car. With millions of images/text corpse, properly designed deep neural network model can somehow be calibrated to “learn” specific task without explicit programming. Normally when people talk about training deep learning, people talk about CUDA, GPU matrix operation, and parallelization, massive memory requirement, etc.
Deep Learning has become a new world language in the recent 5 years. With the latest development in the convolutional neural network, LSTM, attention models, GANs, reinforcement learning, we see a promising trend of training model to do things that in the past human believed only human brain can master. For example, writing a caption to an image, or composing a piece of music, or driving a car. With millions of images/text corpse, properly designed deep neural network model can somehow be calibrated to “learn” specific task without explicit programming. Normally when people talk about training deep learning, people talk about CUDA, GPU matrix operation, and parallelization, massive memory requirement, etc.
Now, as the most popular single-board computer/development kit/IoT board, Raspberry Pi, even the latest 3 Model B+ (1.4GHz CPU, 1G DDR2 RAM), does not have enough computation power to train any decent deep learning model. Forget about training. However, this does not mean that deep learning and Raspberry Pi are exclusive to each other. It is still possible to run a deep learning framework and deep learning model on Raspberry Pi. In fact, it is super fun, and probably also super useful to run forward deep learning on Raspberry Pi. Imaging that your Pi Camera can now identify human being and probably who they are, or issue alert when a bunny is eating your garden, or recognize obstacle for a Pi-powered robot, or display camera frame in van Goghor style, or maybe just play endless Pi-composed Jazz. A new world is enabled by Raspberry Pi + Deep Learning!
As a lazy person, I don’t want to reinvent the wheel. Given that there are well-established, robust, deep learning libraries, such as tensorflow, pyTorch, etc., it makes sense to first try those libraries in the Pi. In this article, I will be showing how to install tensorflow and keras (a high-level wrapper of tensorflow) on Raspberry Pi 3 Model B+ running a Raspbian Stretch (version 9). I haven’t tested the workflow in other Raspberry Pi models or another Raspbian version. However, my intuition told me that Pi 3 Model B or Raspbian Jessie should work the same way.
To proceed, you’ll need to understand basic Linux commands and Python programming and know how to use Raspberry Pi. You do not need to know deep learning, just assume it as a magic black box. I get a lot of help from this post:
1. Which version of Python? Python 2.7!
Raspbian comes with Python 2.7 and 3.5. Although I am a fan of Python 3 and tensorflow prefers Python 3, for Pi, I still highly recommend Python 2.7. The reason is that installing numpy, scipy and opencv with Python 2.7 is so much easier and hassle-free! The last thing I want to do is to build scipy and opencv from binary on Pi. IT IS GOING TO TAKE FOREVER!
2. Installing pre-request libraries
In order to install/run tensorflow and kera, you have to install numpy and scipy, h5py. I also recommend to install OpenCV, because, come on, we want to do image stuff with deep learning.
I highly recommend installing those libraries pre-compiled. Because Pi is a slow computer, it might take 10 min – 2 hr to install those libraries by compiling binary on Pi. And, forget installing OpenCV from source code on Pi! Trust me, it is a painful process!
So how to install pre-compiled libraries?
DO THIS
pi:~ $ sudo apt-get install python-numpy python-scipy python-h5py python-opencv
DO NOT THIS
pi:~ $ pip install numpy scipy h5py opencv
The second approach, most times, end up downloading wheel file and run setup.py for long long long time. I think scipy took me more than 30 min and still failed for some reason. The first approach, easy and fast.
3. Install Tensorflow
I basically followed tensorflow official websites for this part. Some people said that they have to install an older version of tensorflow like 1.0, however, I was able to install 1.9.0 and run it without a problem (well, there were some non-harmful warnings)
First, make sure that you have libatlas library, a linear computation library, is installed. Simply do
pi:~ $ sudo apt-get install libatlas-base-dev
Second, let’s install tensorflow. A simple pip install is likely to fail here. This is become tensorflow and some associated libraries will take more than 100MB size, and be default Raspbian has 100MB allocated for swap. If you use pip install directly, highly likely that you will encounter memory errors. There are two ways to overcome this. One is to temporarily change the swap size, install tensorflow, and chance swap size back. This will require to reboot the Pi twice. An easier way, I believe, is to add some additional argument to pip install:
pi:~ $ pip install --no-cache-dir tensorflow
In this way, we are installing tensorflow without caching. No need to chance swap size.
Installing tensorflow took a while, as for Python 2 we have to compile some libraries. Time for a cup of coffee.
4. Installing keras
This took me a while. Because for some reason installing keras wants to recompile scipy and it always fails me due to some dependencies issues. Now I am very sure that I have all key libraries installed for keras, I only want pip install to install keras itself. So finally I realized that I only need to tell pip install to ignore dependencies. To do this, simply type
pi:~ $ pip install keras==2.1.5 --no-cache-dir --no-deps
I didn’t test other keras version. But I think the newer version should be fine.
5. Test that packages are all installed correctly.
As I said, there are some warnings. But, hooray!
6. Run a pre-trained model
Keras comes with many well-known pre-trained CNN models for image recognition. As a first try, I tested MobileNet, a lightweight small CNN first brought by Howard et al in Google in Apr 2017. The concept of MobileNet is that it is so lightweight and simple and it can be run on mobile devices.
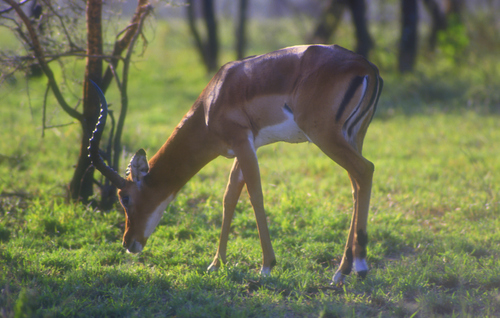
To test it, I downloaded this image

from this website http://www.shadesofgreensafaris.net/images/uploads/mikumi.jpg by typing the following command in terminal
pi:~ $ curl http://www.shadeofgreensafaris.net/images/uploads/mikumi.jpg > image.jpg
And, the bottom of the outputs:
So MobileNet does recognize the impala correctly in its first guess. It tooks about 40 seconds to load the 4 million parameter model, and only took 3 seconds to make a prediction. Not bad!
The article's emphasis on practicality and ease of implementation is a strong point. Given that Raspberry Pi has resource limitations, how do you foresee the balance between model complexity and real-time performance when deploying deep learning models on it? Tel U
ReplyDeleteLinux
ReplyDelete